You Amaze Me!

Hello everyone,

Again it’s long time no post. I struggle to find the time to blog these days. I don’t even create as often as I used to. Things have changed in the Brown House, that’s for sure. The girls have become heavily involved in horse riding. They attend various clinics and competitions and our usual Pony Club rally days. So most weekends and some weekday afternoons are busy with that. I have this year become Treasurer of our local Pony Club and Vice President of the Primary School my youngest attend. I also volunteer in the Prep-2 classroom once a week, plus I am the uniform shop lady at the same school. I am also on the High School’s tuckshop roster. If that’s not enough, the boys will be starting soccer soon, so there is another item to add to the list. I really do need to organise myself better though, I have been known to triple booking my self on occasion. I now actually have two, yes 2, diaries on the go. One for my business and one for everything else. Maybe I should start putting in designated crafting time!!

I have still managed to hold workshops here from home. I have missed a couple last month, but I am now back in business. I thought I would share with you one of the creations from last week. I have totally fallen in love with it and I hope it inspires you to create one too.

you amaze me

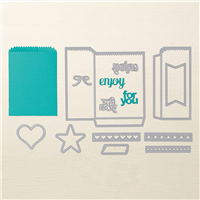
I had a play with the Mini Treat Bag Thinlits Die and turned it into a card pocket. I also created a little coordinating gift box with the Tiny Treat Box.

you amaze me

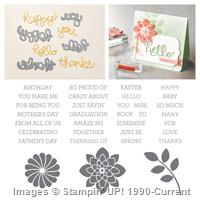
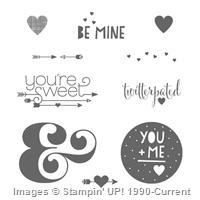
I used the Crazy About You Bundle to create the title and the delicious Indescribable Gift flower stamp for the image. We used our ‘blendies’ to colour it in.

treat flower

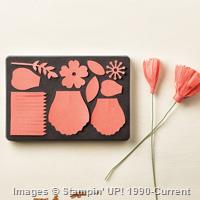
The beautiful Bouquet Bigz Die was used to create the flower.

you amaze me

you amaze me

These could easily be turned into beautiful invites with a few changes….. I can imagine some pretty special wedding ones, just change the sentiment on the front and put the details on the card inside. I will post below the list of all products used in case you would like recreate these one, or if you are just curious as to what I used

Supply List

Built for Free Using:  My Stampin Blog

Can Never Have Too Much Happy With Everything Eleanor

Hello everyone,

I decided to have a play with a challenge. It is something I haven’t done in a while and it was absolutely fabulous. One of my team leaders Alisa Tilsner is a designer at Around the World Stampin’ Up! Challenges and encouraged me to have a play. Here is the challenge-

Colour Challenge

I love colour challenges, it opens you up to so many more possibilities, than say an inspiration challenge. Here is my entry-

Everything Eleanor, Around the World Challenge

I loved playing with the Dictionary stamp as a background on the Peacock card so much, I had a play again. I inked up the whole stamp stamped it off and second generation stamped selective parts of the Dictionary stamp. I use a clear mount stamp, as it is easy to manipulate and bend. What I love about it, is it’s not exact and you never know what you’re going to end up with.

Everything Eleanor is one of my most favourite stamp sets. I just haven’t played with it in a while and it was time to moisten that stamp with some ink. I sponged the edges very lightly with Basic Grey Ink, it really makes the Whisper White border pop.

Everything Eleanor, Around the World Challenge

Something else I haven’t done in a while is play with my Aqua Painter, and I enjoyed that immensely. Colouring improves my stress levels so you can imagine how relaxed I am since the release of the new Blendabilites! LOL.

I hope I have inspired you to participate in a challenge or have a play with one of your favourite stamp sets.

Thanks for dropping by,

Kirsty

Live the Life You’ve Imagined!

Hello everyone,

Since I did the big move to Southbrook I restarted some workshops and quickly found that a scrapbook workshop is the popular choice here in this quaint little town. I haven’t shared any of these projects on my blog and thought I should start. This particular page I am sharing today was this weeks workshop.

Live the Life You've Imagined

I used quite a few stamp sets, six in fact. It is one of the reasons I love Stampin’ Up! The stamp sets coordinate well with each other. Another item I love about Stampin’ Up!, and it is totally free, is the brown packing paper in the Big Brown Box that is filled with your goodies. I use it on my projects as a DSP (designer series paper). You can tear it, scrunch it, stamp on it, spritz ink on it, anything you can think of really. It’s a great neutral ‘filler’ for your layout. It especially looks good on boy themed layouts. Can you tell I love it?!

Live the Life You've Imagined

I sprinkled Whisper White ink in one of my Stampin’ Spritzer bottles over the layout and added a few Candy Dots for a pop of colour. I also outlined some pieces including the DSP with a Basic Black Stampin’ Write marker. I use this technique to make that particular element stand out, but it’s not too much that it takes away from the photo. I used Dimensionals to lift the photo off the page and slide my three tags beneath it. I will use the white for journalling and the other two will be fillers or you can put some smaller photos on them.

Live the Life You've Imagined

It’s a great simple layout anyone can do and the ladies attending loved the workshop. It  also gave me a good excuse to crack open the NEW KRAFT CARDSTOCK!! This stuff is awesome. It is heavier than our regular CS and this is a more natural Kraft colouring. Be sure to check that stuff out, plus any of the other gorgeous products I used.

Thanks for dropping by,

Kirsty

Perfect Peacock!

Hello everyone,

With the release of the new catalogue, there are so many things I would love to have, but if I don’t win Lotto anytime soon (maybe actually buying a ticket would heighten my chances of winning Lotto?! LOL), I will have to get it all bit by bit. So that meant I had to choose very carefully and decide what I couldn’t live without in the short-term. I decided that was the stamp Perfect Peacock and a selection of Blendabilities. I have never had a play with alcohol markers before and wasn’t in the market to purchase any, but that Peacock needed colouring and I decided to get some. I will have a go water colouring it shortly and see how that goes.

In the meantime here is the gorgeousness called Perfect Peacock

Perfect Peacock

Isn’t it just the most beautiful peacock stamp you have ever seen? You will probably see a lot of this stamp as I don’t seem to be able to put to down.

To achieve the background I used the Dictionary stamp. I buy these in clear mount so that I can selectively stamp sections of the stamp. When they are unmounted they are flexible and can be manipulated to stamp what you want. I also used Gorgeous Grunge for the spots. I then sponged in Crumb Cake around the edges of the Whisper White, Bermuda Bay and Crumb Cake CS.

The Blendabilities used were Cool Caribbean, Cherry Cobbler, Old Olive and Daffodil Delight. I used a Pumpkin Pie Stampin’ Write Marker to colour the beak. I did stamp the peacock twice. One to colour and cut out, the other for the base. When I cut the peacock out I then used a Basic Black Marker to colour the edges of the peacock. This got rid of any white edge.

Perfect Peacock


I love how this one turned out, I might even try some different colours next time. I’m thinking Rich Razzleberry.

I do hope I have inspired you to try your hand at Blendabilities. They are crazy fun and easy to use, and I am very happy I bought them. I cannot wait to get my hands on some more colours.

Thanks for dropping by!

Kirsty

Fine Feathers!

Hello everyone,

I just held my retirement workshop yesterday and I have one of the cards to share. I used my most favourite stamp set that is retiring from the Stampin’ Up! catalogue this year, Fine Feathers. I definitely didn’t get enough use of this set, so I might just hang onto it for hobby use.

Fine Feathers

There is a lot going on on this card, but I think well worth it. After creating a circle mask with the circle framelits, I stamped the Hardwood background, followed by gold embossing the feathers. I sponged with Crumb Cake ink and then splattered the background with Calypso Coral and Whipser White.

The sentiment piece consists of Burlap ribbon, Modern Medley DSP, paper doily, Very Vintage Designer Buttons, Vellum clear embossed stamped feathers, Linen Thread, the Oh, Hello stamp set, punched with the decorative label. All this on the base of Naturals White card stock. I told you there is a lot going on, right?!

I love how this one turned out. I must say there are few of its sisters sitting in the bin all crumpled up. We won’t go there……all I’ll say is I’m rusty.

Fine Feathers

The girls enjoyed making this one, which was good news. I love working them hard. LOL!

Thanks for dropping by!

Kirsty

Hello Sweet Friend!

Hello everyone,

I have just recently had some time to sit down and make cards that are my very own creation. I love it when I have enough artistic inspiration to come up with something of my own. It has been a very dry spell on the card making front so far this year and this was a very welcome change. I have created other cards but they were CASE’s of other people’s beautiful work and I will put them up here on my blog in due course to share with you all.

I am so in love with the Fine Feathers stamp set and have been itching to create something “good” with it. I stress the word good because I have struggled with this set since I bought it. I have made a couple of cards with the set, but they will never see the light of day on my blog! LOL. Even though this set is not  predominate on this card it is one of the main elements.

DSC_0479 DSC_0481


Stamp sets used

  • Everything Eleanor
  • Hardwood
  • Fine Feathers
  • Six Sided Sampler

Cardstock used-

  • Crumb Cake
  • Water-colour Paper
  • Vellum

Inks used-

  • Primrose Petals
  • Raspberry Ripple
  • Pool Party
  • Bermuda Bay
  • Crumb Cake
  • Early Espresso
  • Pear Pizzazz

Tool used-

  • White Gel Pen
  • Aqua Painter
  • Clear Embossing Powder
  • Heat Tool
  • Sponges

If you have any questions just ask, either by leaving it in the comment section or email me by clicking on the MAIL link in top right hand corner of my blog.

Thanks for dropping by!


So Grateful!

Hello everyone!

Again long time no post. I don’t know what to say, except I am just not feeling it anymore. I think it has a lot to do with time. I am hardly crafting anymore and I am not sure why. My youngest is now in school and I thought for sure I would have more time to create and play, but I seem to be taking on more things, like I am now working in the uniform shop at the kid’s school on Thursdays and I help out in class each week, sometimes twice. Hubby has also had a change of job which requires him to be away a week at a time and it doesn’t feel right to spend days crafting away. I’m hoping life settles into a rhythm soon that also sees me doing more at my craft desk.

I do however have something to share. It is a card I made for my last ever hostess.

A very quick simple creation, but that seems to be my style lately, lol! So quick in fact that I just coloured the image in with markers….No blending or watercolouring, just whacked those markers on there. I love it! I used Parlor Prints on the bottom of the card to break up the background. The strip of Red Riding Hood stitched Satin Ribbon looks great and creates a lovely border to the non-stamped background.

Thanks for dropping by

Festive Friday Challenge #18

Hi everyone!

I am a little late today posting this. My week has been quite busy and I hope to get back on top of it before Mother’s Day on Sunday so I can sit back and relax! LOL!

Todays Festive Friday Challenge hosted by the lovely Nicole Derendorf is a colour challenge

I love this combo for Christmas cards, it has a lovely country feel to it.

I have used the Framelits die yet again, but this time I used the negative as an accent. You can also see I have used the gold Shimmer Mist over the card to Christmas it up a bit. Stamp set used is my favourite Christmas set, Winter Post and the sentiment is a part colouring of a stamp out of Tags til Christmas. I also used my favourite background for Christmas cards, Woodgrain.

Come along and have a play with the challenge and don’t forget to link your creation at Nicole’s blog

Thanks for dropping by!

Festive Friday Challenge #16

Hello everyone!

Long time no post! I can tell you all the details about what I have been doing but I don’t want to bore you. We have just had some changes in our household and it is taking some adjusting. I hope to be back to regular programming soon.

Today though is all about the Festive Friday Challenge #16. It is all about punched flowers for a Mother’s Day theme. I hope you all get to play along.

Here is my submission for the DT duties!

Here are a couple of photos of it open

I love making different shaped cards and I wanted to incorporate the brand new edgelit die and embossing folder which is featuring in our new Autumn/Winter mini. The link to it is on my sidebar.

I also used new stamp set Mixed Bunch and the coordinating punch, plus some gorgeous new DSP called Twitterpated.

Thanks for dropping by!

Everybunny!

Hello everyone!

I still have heaps of retreat creations to share…so don’t go anywhere. I managed to play with a set that I thought wouldn’t interest me. It was another challenge set by Mads. It was Make a card with a stamp set that pushes our boundaries, something that isn’t normally your style. I chose Everybunny for a couple of reasons. Watercolouring an image has never been one of my stronger suits and I don’t do Easter Cards. I have made one before for a workshop, but I have never made one to give to someone else. For the challenge we could earn extra points if we used our least favourite colour. Well I forego those extra points and used my favourite colour,  Calypso Coral. LOL!

This card is actually prettier than it looks in this photo, but you het the general idea. It is probably one of my favourite cards from the weekend and I will now be buying the Everybunny Stamp Set! LOL!

Thanks for dropping by!